After many trials and many errors, I finally figured out the proper amount of resin to mix up and pour. Also figured out how to get the air bubbles out of the feet. I drilled a second, smaller hole in the mold to let air bubbles out which seems to work well. I will know to keep that in mind next time I make a mold of this guy.
It's going to take a lot of work to get them in shape for customizing. Lost of sanding, cutting, filling, etc. But I've been learning a lot from the whole mess. Hopefully next time I'll make better molds so that I won't have to do so much finishing.
Wednesday, June 30, 2010
Frog Eats Monkey WIP – Casting 03
Monday, June 28, 2010
Frog Eats Monkey WIP – Casting II

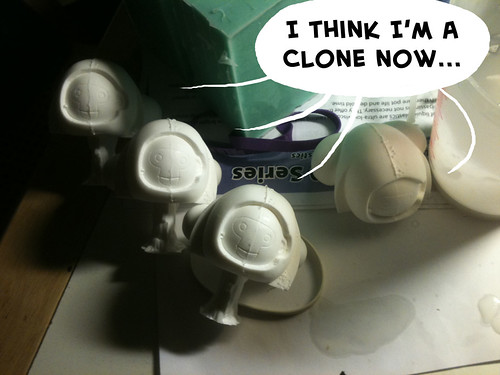
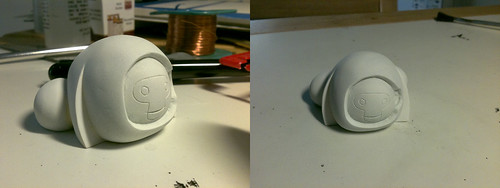
Success! Kinda. I cut the pouring hole much bigger which seemed to work. No giant air bubble to prevent the resin from pouring in. But as you can see from the final pull, there was some air bubble action at the feet. I think next time I will tilt the mold forward a little to make sure the resin coats that area.
There are a lot of air bubbles that I'll have to sand out even if I cast the feet properly. I'll probably end up making another mold of Frog Eats Monkey sometime in the future, but it'll do alright for now. Smooth Cast 300 two-part resin from Smooth-On sets nicely and its bright white color will make it easy to paint and customize.
Frog Eats Monkey WIP – Casting I
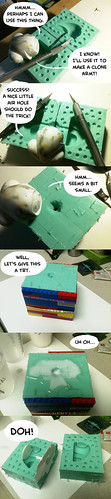
My first casting was a total failure. The hole I cut in the rubber mold was way too thin and created a giant air bubble when I poured the resin. It made me sad. But I learned a lot from screwing up.
Oh, I'm using Smooth-On Smooth Cast 300 two-part resin. It sets wicked fast.
Thursday, June 24, 2010
Frog Eats Monkey WIP – Demolding

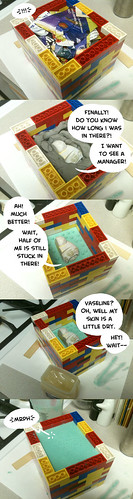
Demolding was a success! Although, I could have used more Vaseline. The mold stuck together in places that didn't have a thick enough coat. But it all worked. There are a few bubbles at the edges, but since those will be positive bumps in the final cast, I can sand them down instead of filling them which is good. Next, time to mix up some resin and pour.
Wednesday, June 23, 2010
Frog East Monkey WIP – Mold Part II
Mold making part II! The silicone set without any bubbles which made me pretty happy.
I used some magazine pages on the bottom since I didn't have enough of the gray clay to fill the entire box. Good thing, too, because that clay was difficult to dig out. As soon as I got down to the rubber, though, it was fairly easy to get out and to clean the area.
Use a little Vaseline so the the second half doesn't stick, mixed my silicone, and poured it in. All I gotta do is set it and forget it. Hoping this all turns out. When it's all cured, I'll cut a channel in the bottom so I can pour in some resin and get to making some toys!
Tuesday, June 22, 2010
Frog Eats Monkey WIP – Mold Part I
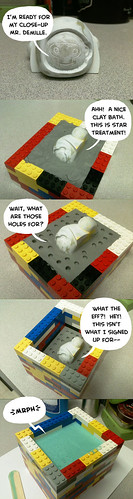
Looks like Frog Eats Monkey isn't quite ready for her/his/its closeup after all!
So this is the first half of a two-part mold. Half the toy is embedded in clay. Holes are poked in the clay which will serve as keys for the two mold halves to make it easier to line up properly when it comes time to cast.
When the clay is all smoothed and poked, it's time to put on the higher wall and pour in some silicone. I'm using Smooth-On Mold Star 15. This is the first time I've ever used it so I hope it works. I'm a little worried about air bubbles but we'll see what happens.
Monday, June 21, 2010
Frog Eats Monkey – Primed
Sprayed on some basic primer to see if there are any more blemishes and dings to sand and fill. There are a few small things here and there but I might leave them. I also kind of like the texture the primer gives the thing. I wonder if it will keep that texture when it gets molded.
Friday, June 18, 2010
Frog Eats Monkey – Sculpting

I've been kind of anxious to design my own toy line so I've decided to just go ahead and do it.
I started this thing months ago and am just now getting back around to finishing it. The base is milliput which is a two-part epoxy putty that dries hard as granite and is terribly hard to work with. The white stuff is magic sculpt which is much easier to carve with a knife. And the yellow stuff is mori mori putt, a two-part putty that is easy to carve and sand and is just so much fun to work with. I've heard of it for years and only now have started to use it. Believe the hype. The shit is amazing!
A little more sanding, some hole filling, some more sanding, and maybe a coat of primer here or there and then it's mold making time.
Say hello to Frog Eats Monkey.
Subscribe to:
Comments (Atom)